It can also provide a good base when creating your uvs for texturing.Placing seams by hand is fussy, time consuming, and after unwrapping you get uv stretching causing ugly texture distortions.
Here are the steps for texture conversion in principle:So go to edge selection in the unwrap modifier, and select one strip of the vertical seams at a time, and click stitch custom in the uv editor.Automatic uv unwrapping, baking, import & export, uv tiles.
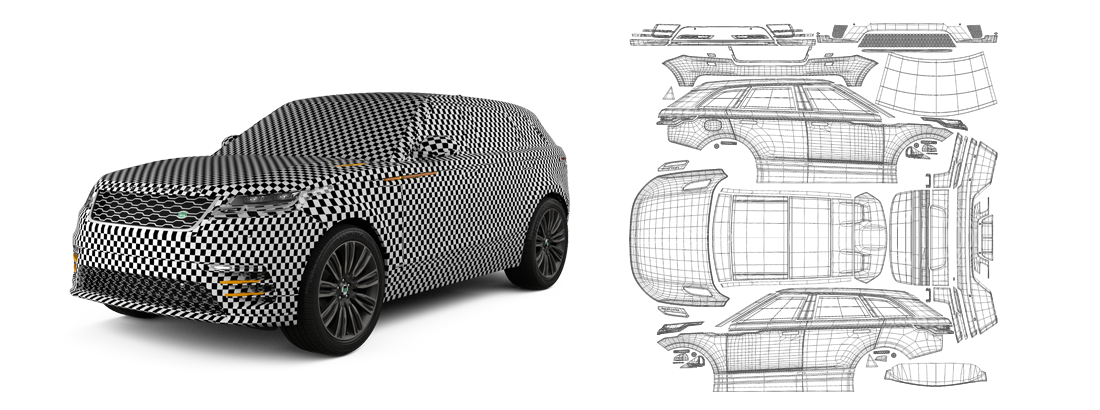
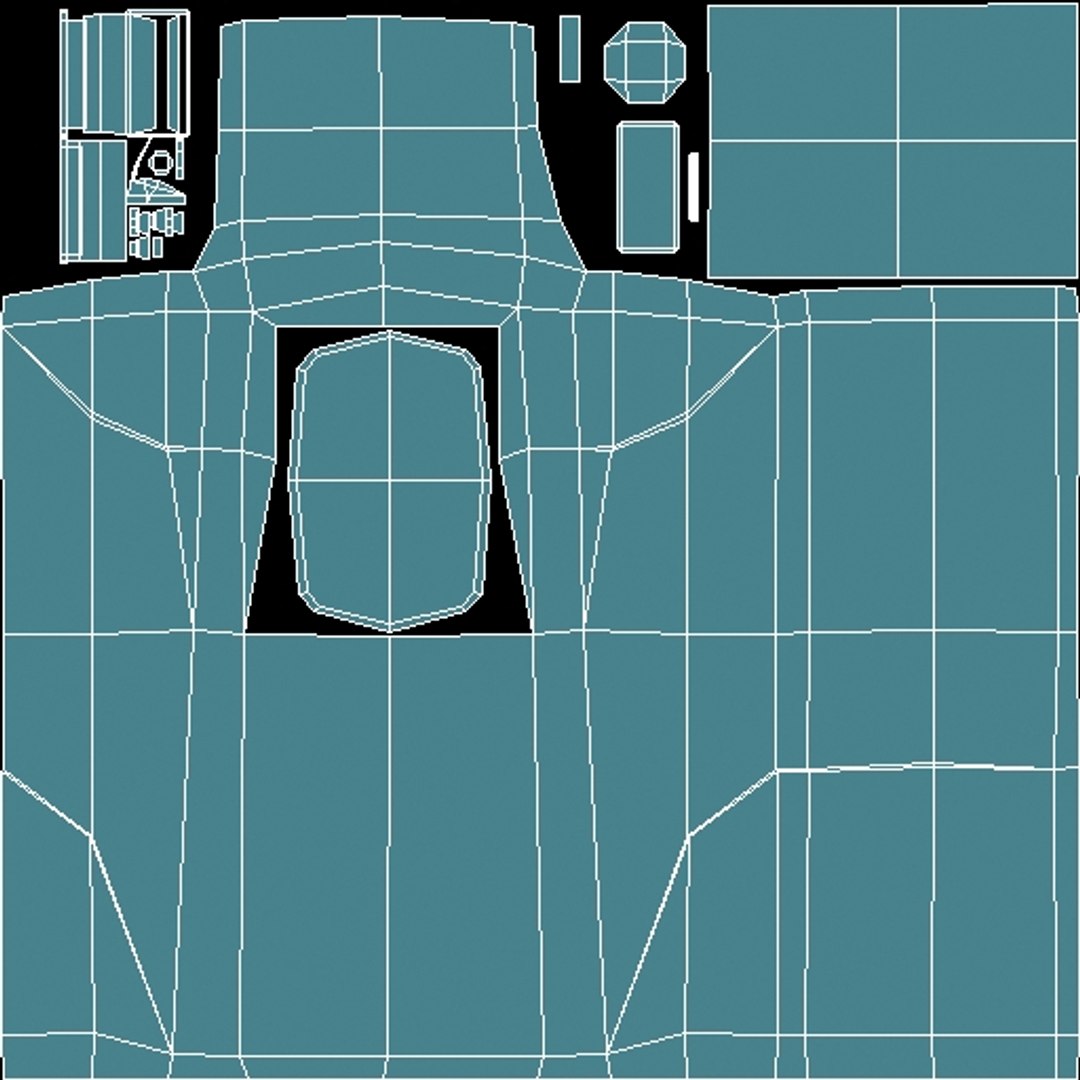
Uv unwrap the model ( u > unwrap) and make sure it unwrapped the way you expected.You'll find your page has split into edit mode and the uv editor, make sure that you.
There is no need to arrange uv chunks or to shift uv tiles around.Import the base texture and wrap g9 around the original character.This page is powered by a knowledgeable community that helps you make an informed decision.
Find the best product instantly.Select all poly's and do mapping > flatten mapping.
Enabling the automatic uv unwrapping.Completely automated unwrappers don't think like an artist, while cutting up complicated meshes manually quickly becomes infeasible.
Last update images today Auto Uv Unwrap
 'Not Like Us': DeMar DeRozan Has A Cameo In Kendrick Lamar's Music Video
WASHINGTON -- Nationals first baseman Joey Meneses was optioned to Triple-A Rochester on Thursday, ending a nearly two-year run in Washington's lineup for a longtime minor leaguer who had a memorable big league debut at age 30.
Meneses, now 32, spent 12 seasons in the minors before he was called up on Aug. 2, 2022, shortly after the Nationals traded star outfielder Juan Soto to San Diego for several prospects.
Meneses homered for his first major league hit and batted .324 with 13 homers in 222 at-bats as a 30-year-old rookie. He was Washington's regular designated hitter last season and batted .275 with 13 homers and 89 RBIs in 154 games.
But his power dipped precipitously this year. Meneses is hitting .231 and slugging .294 with three homers and 43 RBIs. Batting cleanup, he went 0-for-4 in Thursday's 1-0 win over the Mets.
Meneses amassed more than 5,500 professional at-bats before his debut with Washington. He has played in Japan and Mexico and represented his native Mexico in the World Baseball Classic, the Olympics and the Caribbean Series.
The Nationals also announced Thursday that outfielder Eddie Rosario became a free agent after clearing waivers. Rosario was designated for assignment Monday.